Introduction
Waterproofing membranes are an essential component of any construction project, helping to protect buildings from water damage. Whether you are constructing a new building or renovating an existing one, installing waterproofing membranes is a crucial step in ensuring the longevity and durability of the structure. In this article, we will explore the process of installing waterproofing membranes, from preparation to application, to help you better understand this vital aspect of construction.
Preparing for Installation
Before installing waterproofing membranes, certain preparatory steps should be taken to ensure the process goes smoothly and effectively. Here are the key factors to consider:
1. Surface Preparation
Proper surface preparation is paramount for a successful waterproofing membrane installation. The surface needs to be clean, dry, and free of any dirt, dust, or debris. This involves thorough cleaning, Repairing any cracks or damages, removing old coatings or sealants, and ensuring a smooth substrate for proper adhesion.
2. Choosing the Right Membrane
Selecting the appropriate waterproofing membrane for the specific project is crucial. Different membranes are designed for different applications, such as foundation walls, roofs, or below-grade areas. Consider factors such as the type of substrate, exposure to UV radiation, temperature fluctuations, and any specific requirements dictated by local building codes.
3. Assessing Environmental Factors
Before installation, it is essential to assess the environmental factors that may impact the performance of the waterproofing membrane. This includes considerations such as climate conditions, water table levels, and potential exposure to chemicals or contaminants. Ensuring compatibility between the chosen membrane and the surrounding environment is vital for its long-term effectiveness.
Installing Waterproofing Membranes
Once the preparation stage is complete, the actual installation of the waterproofing membranes can begin. The process typically involves the following steps:
1. Primer Application
Applying a primer is often necessary to enhance the adhesion of the waterproofing membrane to the substrate. The primer acts as a bonding agent, ensuring a strong and lasting bond. It is crucial to follow the manufacturer’s guidelines regarding the specific primer to use and the method of application.
2. Membrane Application
Depending on the type of membrane chosen, there are various methods of application. Here are three common ones:
-
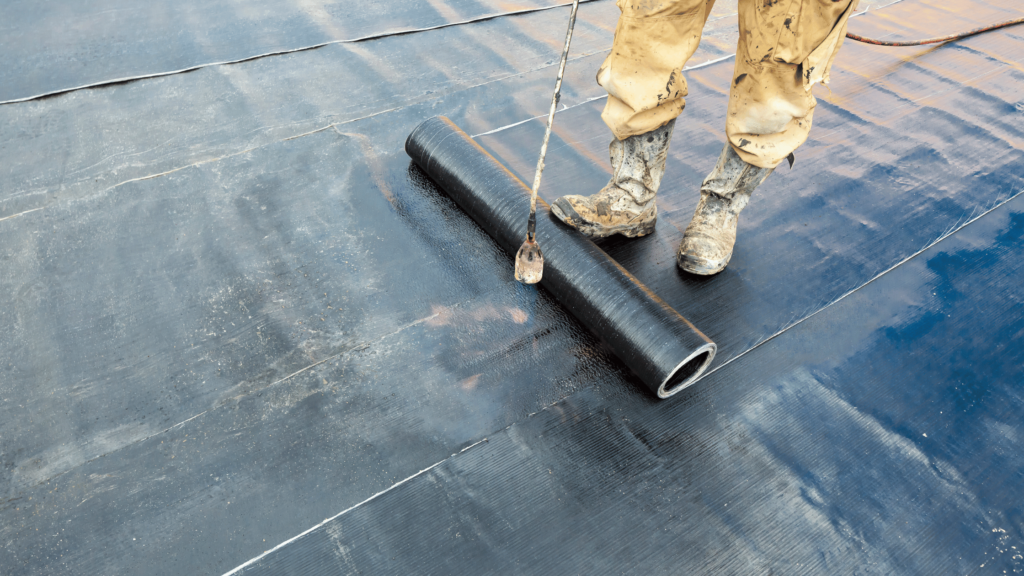
Sheet Membranes: These are typically rolled or unrolled onto the substrate, with overlap areas to create a watertight seal. Sheets are applied using adhesive, heat welding, or self-adhered methods, depending on the specific membrane design. It is crucial to follow the manufacturer’s instructions regarding correct installation techniques.
-
Liquid Membranes: These are applied using a roller, brush, or spray equipment. The liquid membrane forms a continuous, seamless coating that adheres to the substrate. Multiple coats may be required to achieve the desired thickness and waterproofing performance.
-
Bentonite Clay Membranes: These consist of bentonite clay embedded between geotextile layers. The moisture in the soil causes the clay to expand, creating a watertight seal. This type of membrane is often used in below-grade applications.
3. Sealing Joints and Penetrations
Waterproofing membranes often require additional steps to ensure the integrity of joints and eliminate potential weak spots. This involves sealing joints, such as where two membranes meet, using manufacturer-recommended methods and materials. Penetrations such as pipes, drains, or vents also require careful attention to prevent water infiltration.
4. Quality Control and Testing
Once the waterproofing membrane is installed, it is essential to conduct quality control checks to ensure its proper application and functionality. This may involve visual inspections, non-destructive testing, or even flood testing to simulate real-world conditions. Suspected areas of weakness or defects should be addressed promptly to avoid potential water leakage issues.
FAQs about Waterproofing Membrane Installation
Here are some frequently asked questions about the process of installing waterproofing membranes:
-
Q: How long does the installation of waterproofing membranes typically take?
A: The duration varies depending on the size and complexity of the project. Small residential projects may take a few days, while larger commercial projects can extend over several weeks. -
Q: Can waterproofing membranes be installed in extreme weather conditions?
A: It is generally advisable to install waterproofing membranes during favorable weather conditions. Extreme heat, cold, or excessive moisture can affect the adhesion and curing process, potentially compromising the membrane’s performance. -
Q: Can I install a waterproofing membrane myself, or should I hire a professional?
A: While some membranes can be installed by Homeowners, it is often recommended to hire a professional Contractor with experience in waterproofing membrane installation. Their expertise and knowledge can ensure proper application, minimizing the risk of mistakes or improper installations.
Conclusion
The installation of waterproofing membranes is a crucial step in protecting buildings from moisture-related damage. By following the necessary preparation steps, selecting the appropriate membrane, and ensuring proper application techniques, you can enhance the longevity and durability of any construction project. Additionally, addressing joints, penetrations, and conducting quality control checks will help create a watertight seal and minimize the risk of water infiltration. When it comes to waterproofing membranes, investing in proper installation can save you significant time, effort, and expenses down the line.

