Waterproofing is a crucial step in ensuring the longevity and structural integrity of any building, and this is especially true for roof decks. A roof deck is a valuable addition to any property, providing an outdoor space for relaxation, entertainment, and enjoying the view. However, without proper waterproofing, a roof deck can quickly become a liability, leading to costly repairs and potential damage to the structure below. In this article, we will explore the installation process of waterproofing for roof decks, ensuring that your deck remains durable, safe, and protected against water damage.
Understanding the Importance of Waterproofing for Roof Decks
Before diving into the installation process, it is essential to understand why waterproofing is so critical for roof decks. Roof decks are exposed to various weather conditions, including rain, snow, and extreme heat, making them susceptible to water damage. Without proper waterproofing, water can seep into the deck’s surface and penetrate the underlying layers, compromising the structural integrity of the deck and the building itself.
In addition to protecting against water damage, waterproofing also helps to extend the lifespan of the deck. Constant exposure to moisture can lead to the growth of mold and mildew, which not only poses health risks but also degrades the materials used in the construction of the deck. By applying a waterproofing system, you can prevent these issues and ensure the deck remains in its optimal condition for years to come.
Steps Involved in Installing Waterproofing for Roof Decks
-
Prepare the Surface: The first step in the installation process is to prepare the surface of the roof deck. This involves cleaning the deck thoroughly, removing any debris, dirt, and loose materials. It is crucial to have a clean and dry surface before applying the waterproofing system to ensure proper adhesion.
-
Repair and Patch Any Damaged Areas: Inspect the deck for any signs of damage, such as cracks or holes, and repair them before proceeding with the waterproofing. Use a suitable deck repair compound or filler to patch these areas, ensuring a smooth and even surface for the waterproofing membrane.
-
Apply the Primer: Once the surface is clean and repaired, apply a primer to enhance the adhesion of the waterproofing membrane. The primer acts as a bonding agent, creating a strong bond between the deck surface and the waterproofing system.
-
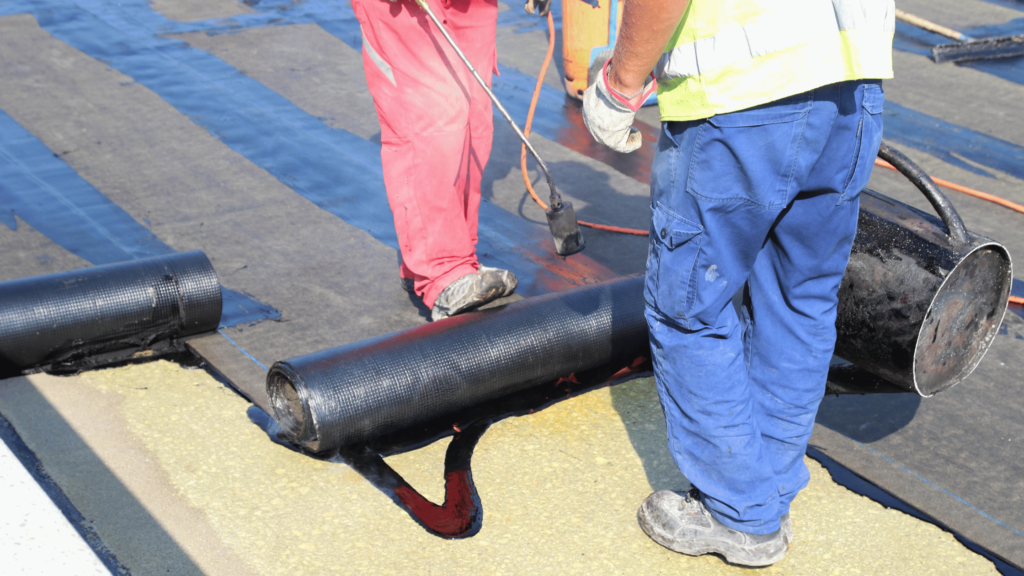
Install the Waterproofing Membrane: The next step is to install the waterproofing membrane. There are several types of membranes available, including liquid-applied, sheet-based, and peel-and-stick membranes. Choose a membrane that suits your specific needs and follow the manufacturer’s instructions for installation. Ensure that the membrane covers the entire deck surface, including any vertical surfaces and edges.
-
Seal the Joints and Seams: Pay special attention to sealing the joints and seams of the waterproofing membrane. These areas are particularly vulnerable to water penetration and should be adequately reinforced to prevent leaks. Use a compatible sealant or adhesive recommended by the manufacturer to secure the membrane in place and create a watertight seal.
-
Apply a Protective Coating: Once the waterproofing membrane is in place, consider applying a protective coating to enhance its durability and resistance to ultraviolet (UV) rays. The coating acts as an additional layer of protection, shielding the membrane from sun damage and extending its lifespan. Choose a coating that is compatible with the waterproofing system and follow the application instructions carefully.
-
Allow Sufficient Drying Time: After completing the installation, it is crucial to allow sufficient drying time for the waterproofing system to cure properly. This timeframe may vary depending on the type of waterproofing materials used, weather conditions, and humidity levels. Follow the manufacturer’s recommendations for the recommended drying time before subjecting the deck to regular use.
FAQs about Waterproofing for Roof Decks
-
How long does the waterproofing system last? The lifespan of a waterproofing system for roof decks varies depending on factors such as Maintenance, exposure to weather conditions, and the quality of the materials used. However, with proper installation and regular maintenance, a well-installed waterproofing system can last anywhere from 10 to 20 years or more.
-
Can I install the waterproofing system myself? While some Homeowners may consider a DIY approach to save costs, it is highly recommended to hire a professional Contractor for the installation of a waterproofing system. Proper installation requires specialized knowledge, experience, and access to professional-grade materials, ensuring a reliable and long-lasting result.
-
What maintenance is required for a waterproofed roof deck? Regular maintenance is essential to prolong the lifespan of a waterproofed roof deck. This includes regular cleaning, removing debris, inspecting for any signs of damage or wear, and reapplying protective coatings as necessary. Following the manufacturer’s maintenance guidelines and scheduling periodic inspections by a professional can help identify and address potential issues before they escalate.
Conclusion
Roof decks offer numerous benefits, but without proper waterproofing, they can quickly become a source of headaches and costly repairs. By understanding the importance of waterproofing and following the proper installation process, you can ensure your roof deck remains durable, safe, and protected against water damage for years to come. Remember to consult with a professional contractor to ensure the best results and long-term performance of your waterproofing system. Invest in the proper installation and maintenance of your roof deck’s waterproofing, and enjoy your outdoor space worry-free.

